


Understanding Engine Knock in UTVs: Causes, Tuning Issues, and How to Prevent Major Failures
Engine knock is one of those sounds that makes every rider freeze and think, “Well… that’s not good.” It doesn’t matter if you’re crawling through rocky trails or hammering across desert sand — once that deep, heavy tapping shows up, the ride’s over. But the real story is that knock never comes out of nowhere. It always starts with a chain of small problems long before the noise ever reaches your ears.
Before tearing an engine apart, there’s still one old-school diagnostic trick that holds its own: the screwdriver test. Press the metal end to the engine, put the handle to your ear, and move it across the crankcase and cylinder. You’ll hear the noise sharpen or soften as you get closer to the source. It’s the easiest way to separate a bottom-end knock from a top-end tap or timing ping.
With that said, let’s walk through what knock truly means — and why tuning and upgrades play a much bigger role than many riders realize.
When the Bottom End Starts Talking
Rod knock is the one every rider fears. It’s deep, rhythmic, and follows engine RPM. By the time you hear it, internal damage has already started.
Most rod failures trace back to oil problems — low oil, overheated oil, old oil, or contamination. But in today’s powersports world, there’s a new troublemaker: performance upgrades running on a stock tune.
Technical Breakdown: Why Rod Bearings Fail
- Low oil level, collapsing the oil film
- Overheated or thinned-out oil loses viscosity
- Bearing clearance widening due to excess heat
- Oil starvation leading to metal-to-metal contact
- Dust contamination from intake leaks
- Detonation pressure spikes hammering the bearings
- Incorrect big-bore installs are increasing piston loading
- Too much ignition timing is causing pre-ignition
Once the oil film fails, the bearing overheats, smears, and destroys the crank journal. The rod starts hammering — creating the unmistakable knock.
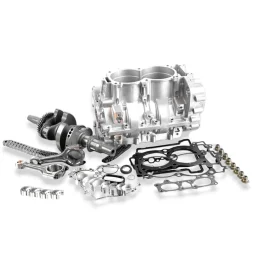
Correct Repair
- Full teardown
- New crankshaft and rod assembly
- New rod and main bearings
- New oil pump
- Thorough oil passage cleaning
- Cylinder machining or replacement
- New piston and rings
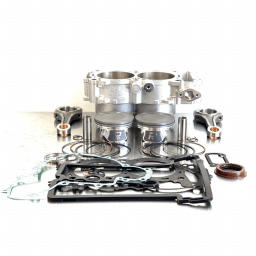
There’s no shortcut here — rod knock means a full rebuild. For riders considering parts or DIY kits, our Engine Rebuild Kit Guide breaks down what type of kit fits each job.
When Performance Upgrades Cause the Failure
This is where things get interesting. A rider installs a high-flow intake, exhaust, or a big-bore kit — but keeps the stock tune. Suddenly, the engine pulls in more air than the ECU accounts for. The mixture leans out. Temperatures rise. Ping begins. Toss in low-octane gas, and the risk climbs even higher.
Detonation starts sending violent pressure waves across the piston, rod, and bearings. The stock bottom end was never built for those shock loads. Eventually, the oil wedge collapses, the bearing fails, and the knock begins.
Technical Breakdown: How Upgrades Lead to Knock
- High-flow intake leans the mixture
- Slip-on exhaust changes the airflow balance
- Big-bore kits raise compression on stock fueling
- Lean AFR increases combustion temperature
- Incorrect timing causes unstable combustion
- Detonation creates massive pressure spikes
- Shock loads crush the oil film on rod bearings
- Debris circulates through the oil system

What Proper Tuning Fixes
- Correct fueling for increased displacement
- Adjust ignition timing for safe cylinder pressure
- Control AFR under acceleration
- Prevent detonation and pre-ignition
- Maintain safe exhaust gas temperatures
- Match injector size to actual airflow
For modified engines, tuning isn’t optional — it’s insurance.
The Top-End Story: Wrist Pins, Pistons, and Slap
Not every knock comes from the bottom end. Wrist pin wear, piston slap, and skirt damage often create a tapping noise that riders confuse with rod knock.
Technical Indicators of Top-End Knock
- Tapping increases with RPM but is higher-pitched
- Noise is loudest near the cylinder
- Cylinder scoring found during teardown
- Wrist pin bushing wear is creating play
- Piston skirt wear is causing cold-start slap
Top-End Fix
- New piston and rings
- New wrist pin and clips
- Hone or bore the cylinder
- Replace the crank/rod if the small end is worn
Dusted Engines: When the Intake Becomes the Enemy
A loose boot, torn filter, or cracked airbox lets dust in — and once it enters the cylinder, it acts like sandpaper. The debris mixes into the oil and heads straight for the rod bearings.
Technical Signs of Dust Ingestion
- Vertical scoring on the cylinder and piston
- Metallic debris in the oil
- Scored crank journals
- Worn cam lobes and tappets
- Premature rod bearing failure
Once a UTV is dusted, the only fix is a full rebuild. To prevent this, check your intake boots regularly and refer to our Help Center for sealing tips and maintenance advice.
Timing Ping: The Imposter That Sounds Like a Mechanical Knock
Ping is a sharp metallic “ting” that often shows up during acceleration. It isn’t caused by mechanical failure — it’s a combustion event happening at the wrong time.
Technical Causes of Timing Ping
- Low octane fuel
- Lean AFR from intake leaks
- Excessive ignition timing
- High compression from big-bore kits
- Carbon buildup
- Lugging the engine under load
- Incorrect tune on modified engines
Fixing Timing Ping
- Use 91+ octane fuel
- Correct the AFR in the tune
- Repair intake leaks
- Clean or replace injectors
- Reduce ignition timing in knock zones
- Remove carbon buildup
Catch ping early, and you’ll avoid detonation — and ultimately rod failure.
The Bottom Line
Engine knock always tells a story. Sometimes the cause is low oil or overheating. Other times, it’s dust ingestion. But today, more often than not, knock is tied directly to performance upgrades paired with stock ignition and fueling.
Tuning is the bridge that keeps modified engines alive. With proper maintenance, sealed intake systems, consistent fuel quality, and a safe tune, nearly all knock-related failures can be prevented.
For riders looking to rebuild or upgrade, explore our REV6 Blog for more tech tips, check our FAQ section, or reach out through our Contact Page. If you’re planning a DIY rebuild, make sure to review our Warranty Details before ordering parts.
Want more technical deep dives? Subscribe to the REV6 YouTube channel: REV6 on YouTube.


